
Your phone, a clear space, and a few simple techniques are all you need to take food photos that stop the scroll and drive more sales.
This guide covers everything a food entrepreneur needs to know about lighting, angles, backgrounds, and styling, without any professional equipment or experience required.
Why food photography matters for your business
Before a customer tastes your product, they see it. On social media, at a farmers market booth, on your website, or in a wholesale pitch deck, your photos are often the first impression your business makes.
For food entrepreneurs operating out of a shared kitchen space or a commissary kitchen in Vancouver, strong visuals can be the difference between a browser and a buyer. Good photography builds trust, communicates quality, and makes your product look worth the price.
1. Get your lighting right first
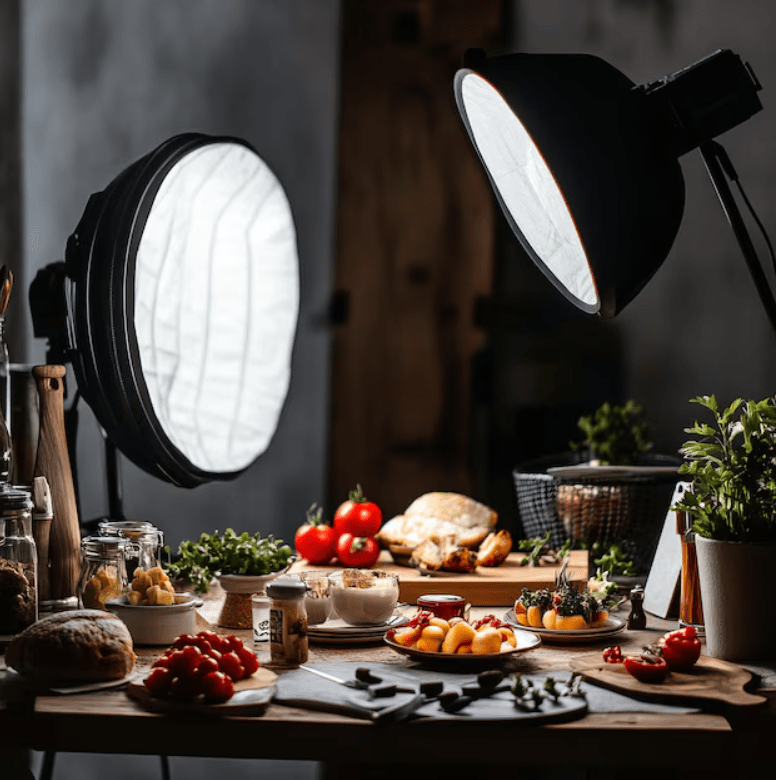
Lighting is the single most important element in food photography. Bad lighting can make even the most delicious product look unappetizing.
Natural light is your best tool. Find a spot near a window with soft, indirect daylight. Avoid direct sunlight, which creates harsh shadows and washes out color.
A few tips:
- Shoot during the day when natural light is available
- Place your food beside the window, not directly in front of it
- Use a white piece of cardboard or foam board on the opposite side of the light source to bounce light back and reduce shadows.
2. Choose the right background
A cluttered or distracting background pulls attention away from your product. Keep it simple.
Popular background options for food photography include:
- White or light-colored surfaces - Clean, versatile, and work well for packaged food products
- Wooden boards or surfaces - Warm and natural, well suited for baked goods, charcuterie, or artisan products
- Marble or stone textures - Elegant and modern, good for premium or specialty products
- Plain fabric or linen - Adds texture without distraction
Match your background to the feeling you want your brand to communicate. A rustic wooden surface tells a different story than a clean white countertop.
3. Master your angles
Different products look best from different angles. Experimenting with angle is one of the fastest ways to improve your food photos.
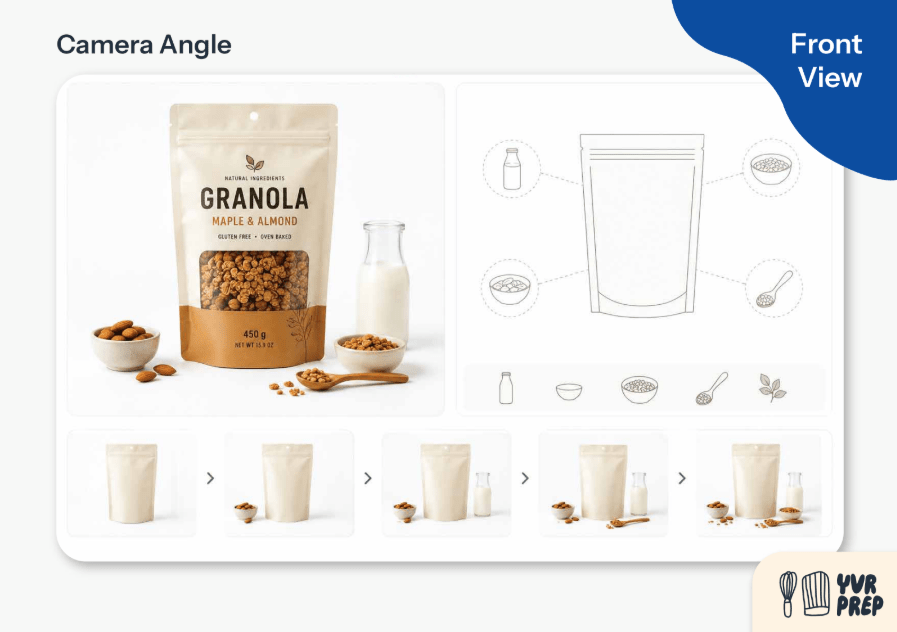
- Front View (eye level) - best for tall items like layered cakes, stacked sandwiches, or drinks. Shows height and dimension.
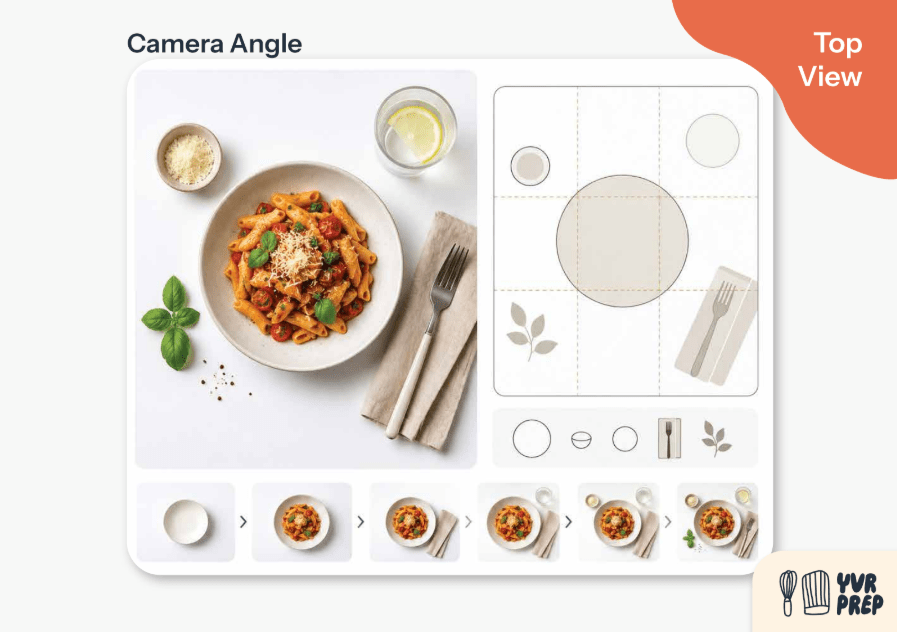
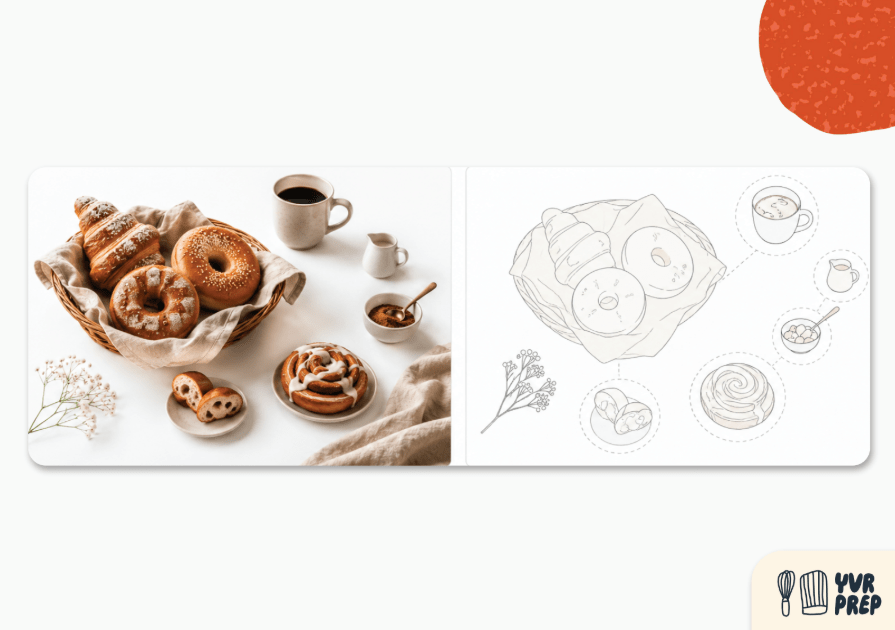
- Top View (overhead, flat lay) - works well for spreads, boards, bowls, and packaged products laid out on a surface. Great for showing multiple items at once.
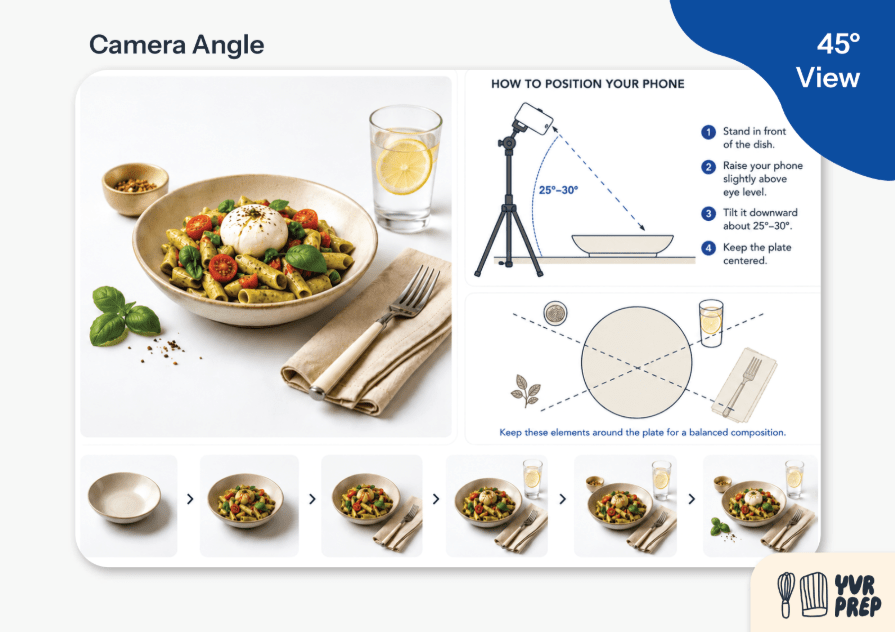
- 45-degree angle - the most natural angle, similar to how you would look at food sitting across a table. Good for most products and easy to start with.
Try all three with the same product and compare. You will quickly see which angle makes your food look most appealing.
4. Style your shot with intention
Food styling does not have to be complicated. Small details make a big difference.
A few simple styling tips:
- Less is more. One or two props are enough. A linen napkin, a wooden spoon, or a small bowl of ingredients can add context without cluttering the frame.
- Show the product at its best moment. Photograph baked goods while they are still fresh. Show sauces poured, not just bottled. Capture steam if you can.
- Add a human element. A hand holding a product or reaching into frame adds warmth and scale, and performs well on social media.
- Keep your branding consistent. Use the same backgrounds, props, and color palette across your photos so your feed or website looks cohesive.
5. Edit simply and consistently
You do not need advanced editing skills to improve your photos. Free apps like Lightroom Mobile or Snapseed are easy to use and make a noticeable difference.
Focus on these basic adjustments:
- Brightness - lift the exposure slightly if the image looks dark
- Contrast - a small increase adds depth and makes colors pop
- Saturation - increase slightly to make food colors look more vibrant, but avoid overdoing it
- Sharpness - a light increase brings out texture in baked goods, produce, or packaged products
Create a simple preset or save your settings so your editing is consistent across all your photos.
6. Take more photos than you think you need
Professional food photographers take dozens of shots to get a handful of great ones. Give yourself the same flexibility.
Shoot multiple angles, try different props, adjust your lighting, and experiment. The more you practice, the faster you will develop an eye for what works for your specific products.
Final thoughts
Great food photography does not require a big investment. It requires attention to light, simplicity in styling, and a willingness to experiment. For food entrepreneurs in Vancouver, strong visuals are one of the most powerful and affordable marketing tools available. They communicate quality before a customer ever tastes your product.
Ready to take the next step?
Book a tour at YVR Prep and join a commissary kitchen
built for growing food businesses.